ISO installation
This section covers ISO-based installation of Live Transcoder on bare-metal hardware.
Prerequisites
BIOS setup
Before starting an ISO installation, please ensure your BIOS settings are compliant so the installation can be completed successfully.
The guide below was created using SuperMicro MB, however, other brands won't differ significantly.
- Start by resetting the BIOS to the default state: Save & Exit → Restore Optimized Defaults
- Set Security → Secure Boot → Secure Boot to [Disabled]
- Set Security → Secure Boot → CSM Support to [Enabled]
- Set Boot → Boot mode select to [LEGACY]
- Set Boot → LEGACY to EFI support to [Enabled]
- Set Advanced → PCIe/PCI/PnP Configuration → NVMe Firmware Source to [AMI Native Support]
- this one is important, especially when NVMe SSD disks are on-board
On-prem installing Live Transcoder
Create bootable disk from ISO
Although our preferred distribution channel is a docker image, we also offer an alternative - ISO installation file.
You can either copy it on a dedicated USB flash drive (using a tool such as UNetbootin) or use a remote network mount to attach it to the destination server unit.
If you use the USB key option, set the drive as a boot device in BIOS. Make sure to allow support for legacy non-UEFI devices.
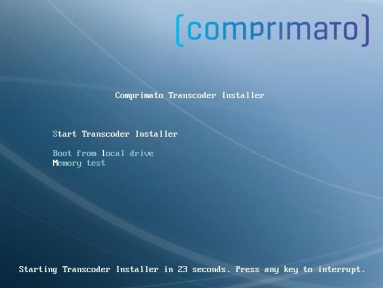
Once booted, there is a welcome screen, as shown in Figure 1. Select an option Start Transcoder Installer to commence the installation or wait until the time interval runs out.
Manual installation
Following are the steps to select the parameters of the installation. The installation wizard is a command-line environment where you need to have a keyboard to provide your input. Overall, there are nine steps to go through:
Before the installation can be commenced, please take time to read and accept Comprimato End User License Agreement (EULA).
-
Select the target disk where the software should be installed. The installer will do all necessary work, such as creating partitions and formatting.
:::warning WARNING! After the installation is triggered, the target HDD is formatted, and all unsaved data is permanently lost. (All other HDDs are left untouched.) :::
-
Transcoder machine hostname.
Type your desired name of the machine. -
Time zone selection. Select the time zone of your location (Region & Country) correctly. It is essential for proper Transcoder functionality. Double-check and confirm the selection.
-
Network interface for administration.
The assigned IP address is used to access the web-based graphical User Interface for Transcoder. -
Interface IP address configuration. Adding the static value or DHCP to the previously selected interface. Before the configuration is finalized after the first boot, this is the only unblocked port in the firewall.
-
User accounts password.
- Provide the web UI password you will use to access the UI. The default user account is admin; it can be changed later from the system's console.
- Provide the password for the default user account transcoder that is used for terminal or SSH access.
-
Confirmation.
The last step is to confirm the selected settings. In case you choose 'no', you can change any of the available settings and continue. -
Installation process.
-
Reboot.
After the installation is successfully completed, you can reboot the machine by pressing any key.:::warning WARNING! Do not remove the installation media before the reboot! :::